안녕하세요, pygutogui를 이용하여 간단하게, Warning Message나, 선택할 수 있는 선택 창을 어떻게 구현을 할 수 있는지에 대해서, 포스팅하려고 합니다.
pyautogui.alert() 모듈 이용하여 선택창 활용하기
일단, 가장 먼자 해야 하는 일은, pyautogui를 까는 겁니다. 이미, Part #1, 2를 참조 하셨다면, pyautogui를 설치를 하셨을거라고 생각합니다. 혹시 설치를 하지 않으셨을 분을 감안하여, 아래와 같이, 설치 구문을 남겨드리겠습니다.
--> pip install pyautogui
- 관련 Snap Shot -

설치를 하게 되면, Terminal 창에 설치 항목이 나올겁니다. 위 화면은 이미 설치가 되어 있을 때 나타나는 창입니다. 저는 이미 pyautogui를 설치를 마쳤기 때문에, 위 창에 나오는 구문이 나오게 됩니다.
그럼 설치를 완료하시고, 처음에 pyautogui를 선언하여, 우리가 pyautogui를 사용하게 세팅을 하여야 합니다.
그리고, 나서 간단한 Message를 하나 띄우도록 하겠습니다.
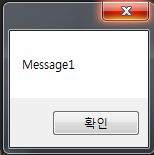
1) Message Box를 1, 2, 3, 4 이렇게 4개 띄우는 Code 내용
import pyautogui

pyautogui.alert('Message1')
pyautogui.alert('Message2')
pyautogui.alert('Message3')
pyautogui.alert('Message4')
2) 위의 Code 실행 결과 (Message1, 2, 3, 4 이렇게 연속으로 나오게 됩니다. 확인을 클릭해 주세요)
그럼 위에 간단한 Message 창을 띄어 봤으니까, 이제는 안에 속성을 한번 바꿔 보겠습니다.
3) Property (속성) 값 변화 후 Message 창 띄우기
import pyautogui
pyautogui.alert('Message1')
pyautogui.alert('Message2')
pyautogui.alert('Message3')
pyautogui.alert('Message4')
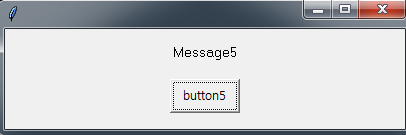
pyautogui.alert(button = 'button5', text ='Message5')
pyautogui.alert(button = 'button6', text ='Message6')
pyautogui.alert(title = 'title7', text = 'Message7')
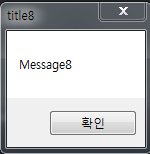
pyautogui.alert(title = 'title8', text = 'Message8')
4) 위의 Code 실행 결과 #1 (MessageBox5에 Button5, MessageBox6에 Button6를 Button Text로 나오게 함)

5) 위의 Code 실행 결과 #2 (MessageBox7에 title7, MessageBox7에 title8를 Title Text로 나오게 함)

자, 위에 간단하게, Message 속성 값 (대부분 TEXT 위주) 을 변경해보았습니다. 그럼, 위에 Button은, 그냥 확인하는 기능만 있고, 넘어가는데, 저희가 소위 말하는, 선택 (두가지 중에 하나 선택하는 Message 창) 창을 띄어 보도록 하겠습니다.
복습한다는 개념으로, 기존에 Code와 비교하면서 보시면 더 도움이 되실 겁니다.
6) 관련 Code 내용 (편의성을 위해서, 다른 Code는 주석처리 하였습니다. 전체 주석 처리는 Ctrl + / 입니다. 참조요망) - Confirm 이라는 Method를 사용하여, Message Box 띄움
import pyautogui
# pyautogui.alert('Message1')
# pyautogui.alert('Message2')
# pyautogui.alert('Message3')
# pyautogui.alert('Message4')
#
#
# pyautogui.alert(button = 'button5', text ='Message5')
#
# pyautogui.alert(button = 'button6', text ='Message6')
#
# pyautogui.alert(title = 'title7', text = 'Message7')
#
# pyautogui.alert(title = 'title8', text = 'Message8')
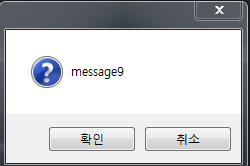
pyautogui.confirm('message9')
7) 위 Code 실행 결과 (확인, 취소 이렇게 두가지 선택 항목이 나옵니다.)
8) 위에 alert Method에 적용했던, 속성값을 변경해 보도록 하겠습니다.
import pyautogui
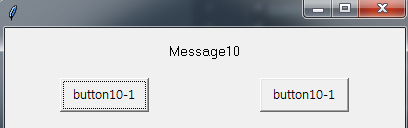
pyautogui.confirm(buttons = ['button10-1','button10-1'] , text ='Message10')
#
# pyautogui.confirm(buttons = ['button11-1','button11-1'] , text ='Message11')
#
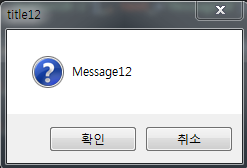
pyautogui.confirm(title = 'title12', text = 'Message12')
9) 위 Code 실행 결과 값 (Button TEXT와 Title을 수정) - 11번이랑, 13번은 중복이라서 생략하였습니다. 하지만, Code를 실행시켜 보시면, 바로 Message 창이 뜨게 되어 있습니다.
그럼, 이제는 저희가 TEXT만 보고, 선택하는 항목에서 구속되지 말고, Input 창을 띄어서, 그 항목 속성값을 저희가 입력하는 창을 띄어 보도록 하겠습니다. 소희 Input 창입니다.
10) Input 창 띄우는 Code (기존 Code랑 비교하면서 보세요!) - 다른건 주석처리 하였습니다.
import pyautogui
# pyautogui.alert('Message1')
# pyautogui.alert('Message2')
# pyautogui.alert('Message3')
# pyautogui.alert('Message4')
#
#
# pyautogui.alert(button = 'button5', text ='Message5')
#
# pyautogui.alert(button = 'button6', text ='Message6')
#
# pyautogui.alert(title = 'title7', text = 'Message7')
#
# pyautogui.alert(title = 'title8', text = 'Message8')
# pyautogui.confirm('message9')
#
# pyautogui.confirm(buttons = ['button10-1','button10-1'] , text ='Message10')
#
# pyautogui.confirm(buttons = ['button11-1','button11-1'] , text ='Message11')
#
# pyautogui.confirm(title = 'title12', text = 'Message12')
#
# pyautogui.confirm(title = 'title13', text = 'Message13')
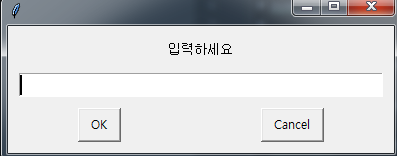
pyautogui.prompt('입력하세요')
11) 위 Code 실행 결과 값 (Input 창 띄우기, TEXT는 "입력하세요"로 설정)
12) Input 창 속성값 수정
import pyautogui
# pyautogui.alert('Message1')
# pyautogui.alert('Message2')
# pyautogui.alert('Message3')
# pyautogui.alert('Message4')
#
#
# pyautogui.alert(button = 'button5', text ='Message5')
#
# pyautogui.alert(button = 'button6', text ='Message6')
#
# pyautogui.alert(title = 'title7', text = 'Message7')
#
# pyautogui.alert(title = 'title8', text = 'Message8')
# pyautogui.confirm('message9')
#
# pyautogui.confirm(buttons = ['button10-1','button10-1'] , text ='Message10')
#
# pyautogui.confirm(buttons = ['button11-1','button11-1'] , text ='Message11')
#
# pyautogui.confirm(title = 'title12', text = 'Message12')
#
# pyautogui.confirm(title = 'title13', text = 'Message13')
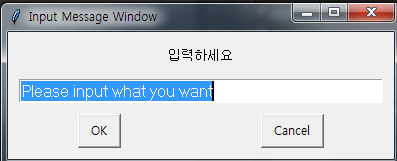
pyautogui.prompt(title= 'Input Message Window', text= '입력하세요', default='Please input what you want')
13) 위 Code 결과 값 (TEXT : "입력하세요", Title : "Input Message Window", 입력창 Default 값 : "Please input what you want" 로 Input 창 속성값 수정)
이상입니다. 지금까지 pygutogui를 이용하여 간단하게, Warning Message나, 선택할 수 있는 선택 창을 어떻게 구현을 할 수 있는지에 대해서 포스팅을 하였습니다. 우리가 평소에 보던 프로그램을 제가 제 맘대로 구현하니 좀 재미 있었습니다. 한 번 코드 구현해보세요.
제 Posting이 조금이나마 정보 전달에 도움이 되셨길 빌며, 되셨다면, 구독, 댓글, 공감 3종 세트 부탁 드립니다. 감사합니다.
[저작권이나, 권리를 침해한 사항이 있으면 언제든지 Comment 부탁 드립니다. 검토 후 수정 및 삭제 조치 하도록 하겠습니다. 그리고, 기재되는 내용은 개인적으로 습득한 내용이므로, 혹 오류가 발생할 수 있을 가능성이 있으므로, 기재된 내용은 참조용으로만 봐주시길 바랍니다. 게시물에, 오류가 있을때도, Comment 달아 주시면, 검증 결과를 통해, 수정하도록 하겠습니다.]
'파이썬 (Python) > 자동화 (Automation)' 카테고리의 다른 글
| 파이썬 Python Macro 구현 pyautogui 이미지 인식하여 마우스 컨트롤 하는 법 + opencv-python (0) | 2021.03.04 |
|---|---|
| 파이썬 Selenium을 이용한 Web Macro Python 프로그램 만들기 (1) | 2021.03.03 |
| 네이버 서치 어드바이저 웹마스터도구 웹페이지 수집 요청을 위한 Automation 수행 Python 코드 (1) | 2021.02.27 |
| 파이썬 Python Macro 구현 pyautogui 패키지 설치 방법 (0) | 2021.02.20 |


댓글